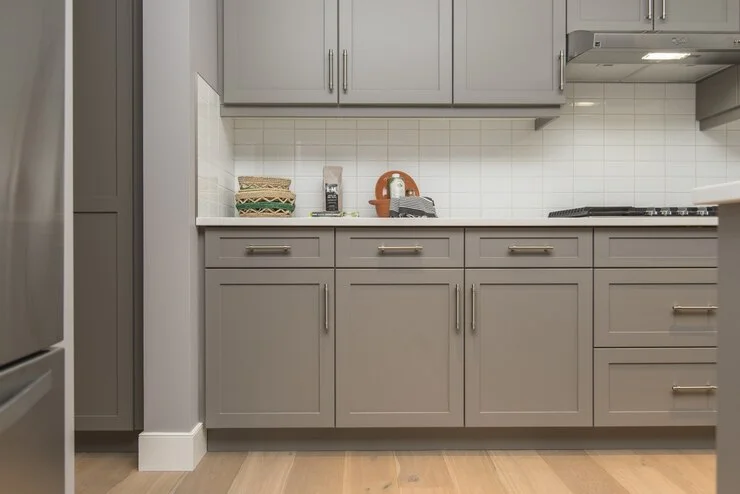
Boxing in cabinet top vents is a simple yet effective solution to improve both the appearance and functionality of your kitchen. By enclosing the vent in a box, you can hide unsightly pipes and create a cleaner, more organized space. This process also helps direct airflow more efficiently, ensuring your kitchen remains well-ventilated and comfortable.
Proper ventilation in kitchen cabinets is essential to prevent heat and moisture buildup, which can cause damage to the cabinetry and other items inside. When your box in a vent, you can help regulate airflow, ensuring that air circulates properly and heat or moisture does not become trapped. This not only protects your kitchen from potential damage but also promotes a healthier and more pleasant cooking environment.
Without adequate ventilation, cabinets can suffer from issues like mold, mildew, or even warping of materials over time. A well-vented space ensures that your kitchen appliances function properly, and your food storage areas remain fresh. Proper ventilation, along with boxing in vents, provides long-lasting protection and improves the overall functionality of your kitchen.
Understanding Cabinet Ventilation
Ventilation is essential for kitchen cabinets because it helps maintain airflow and prevents moisture buildup. Without proper ventilation, moisture can collect in the cabinets, which can cause mold and mildew to grow. This can lead to a damp, musty smell and damage to the cabinet materials.
Common problems from poor ventilation include warping or rotting of wood, rusting of metal parts, and foul odors. Additionally, poor airflow can create a breeding ground for bacteria and insects. When cabinets are sealed tightly without proper ventilation, these issues can worsen over time.
When remodeling or installing cabinets, it’s crucial to address ventilation. If vents are blocked or not properly installed, air circulation will be reduced, leading to potential moisture problems. Adding or adjusting vents during the renovation process can help avoid future issues and ensure long-lasting functionality.
Proper ventilation also helps maintain the temperature and humidity levels inside the cabinets. This is especially important in kitchens where appliances like dishwashers and ovens may increase moisture levels. Good ventilation ensures that these changes do not affect the items stored in the cabinets.
Addressing cabinet ventilation is a smart way to protect your kitchen investment. It prevents the buildup of harmful substances and helps keep the kitchen environment healthy. Whether you are remodeling or building a new kitchen, don’t overlook the importance of ventilation for your cabinets.
How to Put Boxing in Cabinet Top Vents: Step-by-Step Guide?
Tools and Materials Needed:
Tools:
- Measuring tape
- Saw (circular or hand saw)
- Screwdriver or drill
- Level
- Sandpaper
- Paintbrush or roller
Materials:
- Plywood or MDF board (for boxing)
- Screws or nails
- Wood glue
- Primer and paint (optional)
- Dust mask and safety glasses
Safety Precautions:
- Wear safety glasses to protect your eyes during cutting and drilling.
- Use a dust mask to avoid inhaling particles while sawing or sanding.
- Ensure proper ventilation in your workspace.
- Double-check that tools are in good condition and safe to use.
- Keep your work area clear of tripping hazards.
Step-by-Step Guide:
- Measure the dimensions of the cabinet top vent carefully with a measuring tape, noting the height, width, and depth.
- Sketch a basic plan for the boxing structure based on these measurements.
- Mark the plywood or MDF board with a pencil according to your measurements and cut the panels to size using a saw.
- Sand the edges of the panels to make them smooth.
- Arrange the panels into a rectangular box shape, applying wood glue along the edges to hold them temporarily in place.
- Secure the panels together with screws or nails to ensure the frame is sturdy.
- Place the assembled box over the cabinet top vent to check for a snug fit, making adjustments by trimming or sanding if necessary.
- Position the boxing over the vent and attach it securely to the cabinet with screws or nails, ensuring it is level and straight.
- Apply wood filler to any gaps or screw holes, then sand the surface to smooth out imperfections.
- Optionally, apply a primer and paint to match your cabinet or room decor.
- Inspect the boxing to ensure it is firmly attached and aligned, then clean your workspace and store tools safely.
DIY Tips for Boxing in Cabinet Top Vents
It can give your cabinets a cleaner and more polished look. To start, gather all the necessary tools like a saw, measuring tape, screws, and wood glue. Using the right materials, such as plywood or MDF boards, ensures durability and a professional finish.
When choosing materials, select lightweight but sturdy wood or MDF for easy handling and a sleek result. Measure the cabinet top vent carefully to avoid any sizing errors that could make the boxing uneven. Always sand the edges of your wood panels to ensure a smooth and safe finish.
For assembling the box, use wood glue to hold the panels in place temporarily, then secure them with screws. Always test-fit the boxing over the vent before attaching it to confirm the fit is perfect. Painting or staining the boxing to match your cabinets can make the entire setup blend seamlessly.
Avoid common mistakes like skipping the measuring step or using poor-quality materials that might warp over time. Another error to avoid is over-tightening screws, which can crack the wood and weaken the structure. Always use a level to check that your boxing is straight and aligns properly with the cabinet.
Finally, ensure your workspace is clean and organized to avoid accidents or misplaced tools during the project. Safety should be a priority, so always wear protective gear like goggles and a dust mask when cutting wood. By following these simple tips, you can create a professional-looking boxing for your cabinet vents with ease!
Exploring Different Ventilation Options
Proper ventilation is essential for maintaining airflow and preventing overheating in areas with enclosed cabinets or furniture. To achieve better air circulation, options such as toe kick vents, cabinet vents, and kickboard vents are highly effective. Each of these solutions serves a distinct purpose, depending on specific needs and space requirements.
For instance, toe kick vents installed at the base of cabinets allow unobstructed airflow while also maximizing usable cabinet space. On the other hand, cabinet vents efficiently release heat trapped inside enclosed spaces, making them particularly useful in appliance-heavy areas. Meanwhile, kickboard vents seamlessly combine style and functionality, blending harmoniously with cabinet designs while improving ventilation.
To improve airflow under a cabinet, it is crucial to first identify areas where heat or moisture tends to accumulate the most. Subsequently, installing toe kick vents in the baseboard can help redirect airflow without compromising the cabinet’s storage capacity. Furthermore, positioning these vents strategically ensures optimal air circulation throughout the room.
When cabinets are placed over existing floor vents, airflow can become obstructed, leading to heating or cooling inefficiencies. In such cases, using vent redirectors to channel airflow outward or installing custom grilles on the cabinet base can resolve the issue effectively. Similarly, built-in benches covering vents require adaptations like vent extensions or grilles to maintain proper air circulation.
Overall, proper ventilation solutions not only improve airflow but also prevent moisture buildup and reduce the risk of structural damage. Therefore, selecting the appropriate type of vent based on your space and design needs is vital for achieving effective results. With thoughtful planning and attention to detail, you can enhance ventilation while preserving the room’s aesthetics and functionality.
Redirecting Vents in the Kitchen
Redirecting vents in your kitchen improves airflow and creates a comfortable environment. For example, you can use vent deflectors to adjust wall vents positioned under furniture, such as a couch. These deflectors channel air effectively into open spaces, ensuring unobstructed airflow.
Placing cabinet vents correctly maintains airflow and prevents appliances in enclosed spaces from overheating. Install vents in areas where heat and moisture build up the most. Strategic vent placement enhances ventilation and protects your cabinets from damage caused by trapped heat.
In some kitchens, ventilation problems arise due to blocked floor vents or misaligned airflows caused by improper design. Installing vent extenders or redirectors can help move the airflow to a more functional direction. These solutions are especially useful when large furniture or cabinets obstruct existing vents.
When designing a kitchen, plan for airflow pathways to avoid common issues such as uneven cooling or heating. Cabinets over floor vents can be modified with grille installations to keep air flowing without removing the cabinet. Maintaining good airflow prevents moisture buildup, which helps protect kitchen structures and keeps the air fresh.
Using simple adjustments, like vent deflectors or extenders, ensures that airflow reaches where it is needed most in the kitchen. Proper ventilation planning not only improves comfort but also boosts the efficiency of your heating and cooling systems. With these solutions, you can create a kitchen design that is both functional and comfortable for daily use.
Community Insights and Advice
It has been a popular topic on DIY forums like Reddit, where enthusiasts share creative ideas. Many users discuss their successes and challenges, offering real-world advice that is both practical and easy to follow. Engaging in these discussions can provide unique insights you might not find in traditional guides.
Experienced DIY enthusiasts often emphasize the importance of accurate measurements and selecting durable materials for boxing projects. They recommend using lightweight plywood or MDF to ensure a sturdy yet manageable structure. Additionally, sanding and sealing the panels before installation can make a significant difference in achieving a polished look.
The community frequently shares innovative solutions for common issues, such as uneven vent edges or difficult-to-fit spaces. One popular tip involves using vent trim or decorative grilles to mask imperfections and enhance the design. Another suggestion is to use adjustable brackets, which make attaching the boxing more flexible and precise.
For beginners, many Reddit users advise starting with a simple design and gradually improving their skills with practice. Step-by-step instructions, paired with photos or videos, help visualize the process and avoid mistakes. These community contributions ensure that even those new to DIY projects can confidently tackle vent boxing tasks.
By exploring these shared insights and advice, you can save time and learn from others’ experiences while personalizing your project. Community forums are a treasure trove of tips, from material selection to finishing touches that make your boxing look professional. With the right guidance, even challenging projects can become rewarding and achievable.
Final Thought
Properly boxing in cabinet top vents provides multiple benefits, including improved airflow and a more polished cabinet appearance. By reducing heat buildup and protecting the cabinet structure, you can extend the life of your kitchen or furniture. This simple yet effective upgrade enhances both functionality and aesthetics in your space.
With the tips and steps provided, you can confidently start your vent boxing project and avoid common mistakes. Using the right materials, tools, and techniques ensures that your DIY effort will yield professional-looking results. Remember, careful planning and attention to detail are key to achieving a seamless and durable finish.
For further ideas and advice, explore online resources and join DIY communities where enthusiasts share their projects and experiences. These platforms are filled with creative solutions, helpful tutorials, and encouragement to inspire your next home improvement endeavor. Start your vent boxing journey today and enjoy the satisfaction of completing a practical and stylish upgrade!
Frequently Asked Questions (FAQs)
Q1: Can you have a vent under a cabinet?
Yes, you can have a vent under a cabinet to improve airflow. It helps in circulating air and preventing moisture buildup. Make sure it’s placed in the right spot for effective ventilation.
Q2: Can I box in my extractor fan?
You can box in your extractor fan, but it’s important to leave space for airflow. The box should not block the fan’s ventilation. Make sure to follow safety guidelines when boxing it in.
Q3: How to hide vent pipe in kitchen?
To hide a vent pipe in the kitchen, you can use cabinets or custom covers. A decorative box or panel can help hide the pipe while allowing airflow. Just make sure it doesn’t block the venting function.
Q4: How do under cabinet vent work?
Under cabinet vents help to release heat and moisture from appliances like dishwashers or refrigerators. They direct the airflow under the cabinet to keep the space cool. Proper placement is important for effective venting.
Q5: How do box vents work?
Box vents work by allowing air to flow through a sealed box into a space. They can be installed in cabinets to release heat or moisture. Box vents help maintain a comfortable and safe temperature in small spaces.
Q6: How do under cabinet heaters work?
Under cabinet heaters are installed beneath kitchen or bathroom cabinets to provide heat. They work by heating up the air around them and circulating it into the room. These heaters can be a great way to keep your space warm without taking up extra room.
Q7: How does a heater box work?
A heater box encloses a heating element and helps to direct heat into a room. The box ensures that the heat is spread evenly without being too concentrated. Heater boxes are often used in places where space is limited, like under cabinets.
Q8: Can you use a cabinet heater indoors?
Yes, cabinet heaters can be used indoors, often in kitchens, bathrooms, or small rooms. They are designed to warm up the space without taking up much room. Always follow the manufacturer’s instructions to ensure safe use.
Q9: What is a heat cabinet?
A heat cabinet is a special type of cabinet used to store items that need to stay warm. It uses a heating element to maintain a constant temperature inside. Heat cabinets are common in kitchens or labs where heat is needed for storage.
Q10: What is a cabinet cooler?
A cabinet cooler is a device that cools down the inside of a cabinet or storage area. It works by circulating cool air to prevent overheating of items inside. Cabinet coolers are useful for electronics or appliances that need to stay cool.
Q11: What is plinth heating?
Plinth heating refers to a type of heating system installed at the base of cabinets or walls. It works by using warm air rising from the heater to heat the room. This heating method is effective for evenly distributing warmth throughout a space.
Q12: What is an under cabinet microwave?
An under-cabinet microwave is a microwave installed below the cabinets, saving counter space and making the kitchen look more organized. It is securely mounted and offers easy access for heating food.
Q13: What is a microwave vent?
A microwave vent removes heat, smoke, and steam produced by the microwave, helping keep the kitchen air fresh and preventing moisture buildup. Most microwaves have built-in vents to improve air circulation.
Q14: What is a microwave box?
A microwave box is a protective cover that surrounds a microwave when mounted or installed. It hides the microwave’s ventilation system and enhances its appearance while also improving safety.
Q15: What is an inverter microwave?
An inverter microwave uses advanced technology to provide consistent, even heat during cooking. It adjusts power levels to cook food more efficiently and is known for its energy-saving features.
Q16: Which type of microwave is best?
The best type of microwave depends on your needs, but inverter microwaves are often a top choice. They provide even cooking and energy efficiency. When choosing a microwave, consider factors like size, wattage, and user-friendly controls.
Q17: What are flatbed microwaves?
Flatbed microwaves use a rotating ceramic plate to cook food without the need for a turntable. They offer more space inside the microwave for larger items. Flatbed models are a good choice for those who need extra cooking room.
Q18: Which is better, convection or inverter microwave?
Convection microwaves are great for baking and roasting, while inverter microwaves provide more even cooking. The choice depends on whether you need more versatile cooking options or energy efficiency. Both types have their advantages for different cooking needs.
Q19: Does an inverter microwave save electricity?
Yes, inverter microwaves save electricity by adjusting the power level to cook food more efficiently. They use less energy compared to traditional microwaves. This feature makes them an environmentally friendly choice.
Q20: What is the disadvantage of convection microwave oven?
The main disadvantage of convection microwave ovens is that they tend to be more expensive than regular microwaves. They also take up more space due to their added functions. However, they offer more cooking options for those who want versatility.
Q21: How many liters of microwave should I buy?
The size of the microwave depends on how much space you need. A 20-25 liter microwave is perfect for small families, while larger ones are better for bigger households. Always consider the space available in your kitchen before purchasing.
Q22: What type of microwave can I put in a cabinet?
You can install a built-in microwave in a cabinet, but it should have proper ventilation. Make sure to choose a microwave that fits the cabinet space and has a good cooling system. Consult the manufacturer’s instructions for safe installation.
Q23: How many watts is a good microwave?
A good microwave should have between 800 to 1000 watts for average cooking needs. Higher wattage can cook food faster, but it may also increase energy consumption. Choose a microwave that fits your needs and cooking habits.
Q24: How to know a good microwave?
A good microwave has a high wattage, multiple cooking presets, and a user-friendly interface. It should cook food evenly and be energy-efficient. Look for positive reviews and ratings from other users to ensure quality before purchasing.